Power BI is a widely used reporting tool in the market today. It offers rich integrations and visualization capabilities. Access to a specific user can be restricted at various levels to protect data. This article will describe Power BI row level security.
What is Power BI user access?
Power BI allows restricting access to users on the workspace, report level, and data level.
Authentication (Limit access to content)
Limit access to Power BI through the admin portal. So, users will have limited privileges in the Power BI workspace. If we use Power BI apps to share reports, we can limit access to report content in the app.
Authorization (Limit access to data using RLS in Power BI)
Limit access to data with row-level security (RLS). So, roles can be created in the Power BI dataset with specific data access, and users or groups can be added to these roles.
How to implement Power BI row level security
Follow the below steps to implement roles in the Power BI desktop for row-level security.
1. Open the Power BI report using the Power BI desktop.
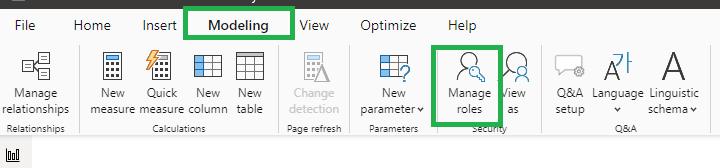
2. Navigate to the Modeling tab and Click the ‘Manage roles’ button.
3. Click the ‘Create’ button to create a new role on the ‘Manage roles’ screen. You can apply filters for each role based on your requirements.

If you want to implement row-level security so that an employee can only see his/her own data, then you can use the below filter condition on the email address column of the Employee table.
[Email] = userprincipalname()In the above case, the Employee table should be related to the fact table to filter the data to filter data based on logged-in users.
4. Depending on the requirements, You can add as many roles as you want.

Review RLS in Power BI Desktop
Once you have defined all your roles, Testing them on the Power BI desktop before publishing the report is recommended. Follow the below steps to do it.
1. In the Power BI desktop file where you implemented the RLS, navigate to the Modeling tab and click the ‘View as’ button.

2. Select the role you want to test on the ‘View as roles’ popup screen. You can check the ‘Other user’ checkbox, enter the email address of the person you want to test the RLS with, and Click OK.
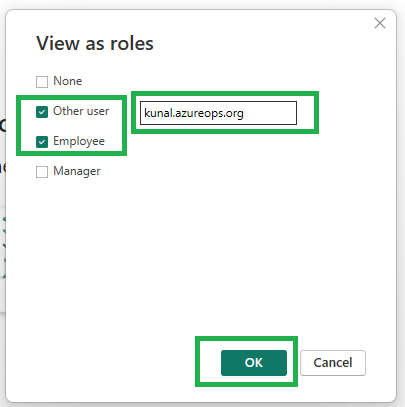
3. The report will show data only for the selected role and user.
Once you have reviewed the RLS, you can publish this report to the Power BI service.
Add users to Power BI roles.
Now, let’s add users to the Power BI roles defined in the Power BI report. Follow below quick steps below to do it.
1. Navigate to the Power BI workspace containing the report. Click on the Ellipsis […] icon next to the Power BI report dataset containing the roles and Click on Security, as shown in the image below.

2. Select the role, search for people you want to add to the roles, and Click Add.
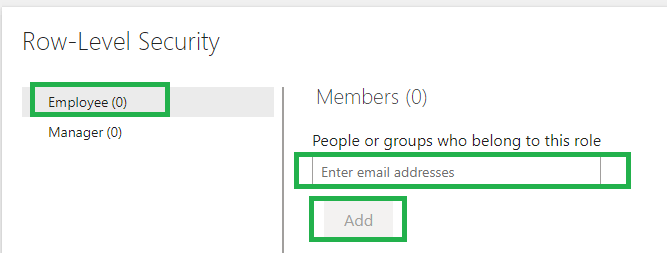
3. Make sure to Save the changes once you have finished adding people to the roles.
Add user access to Power BI reports
Users should also have access to reports unless the users have workspace-level permissions. To grant access to the report, follow the below steps.
1. Navigate to the PowerBI workspace and Click the Ellipsis […] icon next to the Power BI report. Click on ‘Manage permissions’.

2. Click the’ Add user’ button Under the ‘Direct access’ tab.

3. Search for the user and choose the appropriate settings as shown in the below image.

Repeat the above steps for all the reports using the shared RLS dataset.
Test Power BI row level security
Once you have added all the users to their respective roles, testing RLS in the Power BI service is a good idea before sharing the reports with end users. You can refer to this post to learn more about it.
Pro tips:
1. If members are not added to the role but have access to the report containing dataset RLS, then RLS will not be applied to them.
See more
Kunal Rathi
With over 14 years of experience in data engineering and analytics, I've assisted countless clients in gaining valuable insights from their data. As a dedicated supporter of Data, Cloud and DevOps, I'm excited to connect with individuals who share my passion for this field. If my work resonates with you, we can talk and collaborate.